

How to install a Dimpled Roller Shell?
Leave a message

Hey there! I'm a supplier of Dimpled Roller Shells, and I'm stoked to share with you a step-by-step guide on how to install one. Whether you're a DIY enthusiast or a professional in the industry, this guide will walk you through the process and make sure you get the job done right.
Step 1: Gather Your Tools and Materials
Before you start the installation, you'll need to gather all the necessary tools and materials. Here's a list of what you'll need:
- Dimpled Roller Shell
- Socket wrench set
- Torque wrench
- Rubber mallet
- Safety goggles
- Gloves
It's also a good idea to have some One-piece Pulverizer Teeth Liner on hand in case you need to make any adjustments or repairs during the installation process.
Step 2: Prepare the Roller
The first step in installing the Dimpled Roller Shell is to prepare the roller. Start by cleaning the roller surface thoroughly to remove any dirt, debris, or rust. You can use a wire brush or sandpaper to clean the surface. Make sure the surface is smooth and free of any bumps or scratches.
Next, measure the diameter of the roller to ensure that the Dimpled Roller Shell you have is the correct size. If the shell is too small, it won't fit properly, and if it's too large, it may not provide the necessary grip.
Step 3: Install the Dimpled Roller Shell
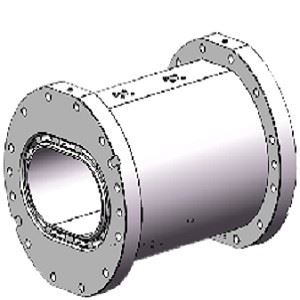
Once the roller is prepared, it's time to install the Dimpled Roller Shell. Start by placing the shell over the roller and aligning the holes in the shell with the holes in the roller. Use the socket wrench to insert the bolts through the holes and tighten them slightly.
Make sure the shell is centered on the roller and that there is an equal amount of space between the shell and the roller on all sides. You can use a rubber mallet to gently tap the shell into place if necessary.
Step 4: Tighten the Bolts
After the shell is in place, use the torque wrench to tighten the bolts to the recommended torque specification. Over-tightening the bolts can cause the shell to crack or break, while under-tightening can cause the shell to loosen and fall off.
Refer to the manufacturer's instructions for the recommended torque specification. If you don't have the instructions, you can usually find the information online or by contacting the manufacturer.

Step 5: Check the Alignment
Once the bolts are tightened, check the alignment of the Dimpled Roller Shell. Use a straightedge or a level to ensure that the shell is straight and parallel to the roller. If the shell is not aligned properly, it can cause uneven wear and tear on the shell and the roller.
If the shell is not aligned properly, you can use a rubber mallet to gently tap the shell into place. Make sure to check the alignment again after making any adjustments.
Step 6: Test the Roller
After the Dimpled Roller Shell is installed and aligned, it's time to test the roller. Start the machine and let it run for a few minutes to make sure the roller is working properly. Listen for any unusual noises or vibrations, which could indicate a problem with the installation.
If you notice any problems, stop the machine immediately and check the installation. Make any necessary adjustments or repairs before starting the machine again.
Step 7: Maintenance and Care
Once the Dimpled Roller Shell is installed and working properly, it's important to maintain and care for it to ensure its longevity. Here are some tips for maintaining and caring for your Dimpled Roller Shell:
- Regularly clean the shell to remove any dirt, debris, or rust.
- Check the bolts periodically to make sure they are tight.
- Replace the shell if it shows signs of wear and tear, such as cracks or chips.
- Use Rubber Elevator Belt and Extrusion Screw Barrel that are compatible with the Dimpled Roller Shell to ensure optimal performance.
Conclusion
Installing a Dimpled Roller Shell is a relatively simple process that can be done by anyone with basic mechanical skills. By following these steps and using the right tools and materials, you can ensure that the installation is done correctly and that the roller works properly.
If you have any questions or need further assistance with the installation process, don't hesitate to contact us. We're a leading supplier of Dimpled Roller Shells and other industrial equipment, and we're here to help you with all your needs. Whether you're looking for a replacement shell or a new roller, we have the products and expertise to meet your requirements.
Feel free to reach out to us if you're interested in purchasing Dimpled Roller Shells or any of our other products. We offer competitive prices, high-quality products, and excellent customer service. Let's start a conversation and see how we can work together to meet your industrial equipment needs.
References
- Manufacturer's instructions for Dimpled Roller Shell installation
- Industry best practices for roller installation and maintenance


